
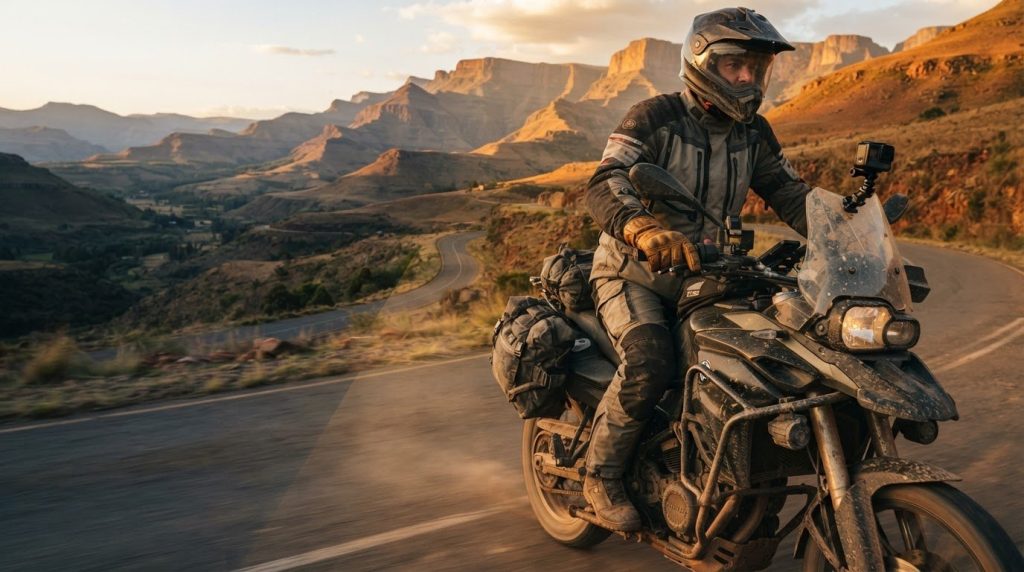
Capture video on a motorcycle tour in short segments, using a securely positioned camera and controls you can operate with your gloves on. Set the camera to 60 frames per second for smooth motion, frame the road and surrounding scenery, and avoid pointing the lens at the sun to reduce glare and overexposure. Short clips make it easier to find the strongest moments later.
The open road deserves to be remembered, from sweeping mountain bends to the changing light across South Africa’s landscapes. But filming every moment can leave you with hours of footage and fewer chances to enjoy the ride.
This guide shows you how to time shots, choose useful camera angles and work physical controls with gloves, then make each clip count without letting glare wash out the view. You’ll also learn how to prepare your camera settings before setting off, record manageable segments and capture the journey while keeping your attention on the ride.
Key Takeaways
- Choose a camera position that captures the road and scenery without requiring you to handle the camera while riding.
- Practise using physical controls with your gloves on before setting off, so recording takes less attention on the road.
- Record short clips to make it easier to find the most engaging moments when you review your footage.
- Use a 360-degree camera to capture different perspectives, then reframe the footage during editing.
- Keep the lens away from direct sunlight to help reduce glare and overexposure.
Manual shutter timing and camera angles
Plan each shot around a clear view and choose the camera angle before setting off. Reaching for a camera to press the shutter while moving can put your arm in the frame and distract you from the road.
-
Choose camera angles and perspectives
Position the camera to show the road ahead, the surrounding landscape or a rider’s perspective. A forward-facing view can emphasise a winding pass, while a side-facing view brings roadside scenery into the frame. Check the composition while stationary, including whether the handlebars, helmet or your arm obscure the view. Keep the road and horizon visible when the landscape is the main subject.
-
Use multiple cameras for varied angles
Use separate cameras for distinct views, such as one facing forward and another showing the rider or scenery to the side. Check that each camera captures the intended view before departure, rather than relying on a last-minute adjustment. Compare sample footage from both positions while stopped. If both frames show the same stretch of road, reposition one camera to create a genuinely different perspective.
-
Time manual shutter presses deliberately
Choose a recognisable moment before recording, such as entering a broad bend or passing an open viewpoint. If you need to trigger the shutter manually, do so when safely stopped, not while reaching across the bike in motion. Your arm could intrude into the frame, block the scenery or shift the camera’s view. Start recording before the planned moment so the camera is already running as the landscape opens.
-
Frame the road without losing the scenery
Set the camera angle to balance the road with the landscape beyond it. For a mountain pass, include enough road to show the curve and enough background to reveal the slope’s scale. On a coastal route, keep the horizon in view instead of filling the frame with the handlebars. Review a stationary test clip and adjust the camera if the road or intended scenery disappears.
-
Check each angle before setting off
Inspect the view from every camera after mounting it. While stationary, turn the handlebars through their normal range and check whether parts of the bike enter the frame. Confirm that each lens points where intended, particularly if a camera sits low or to one side. Make adjustments before the journey, when your attention is not needed on the road.
Manually triggering a camera shutter while riding can put your arm in the shot. Keep your hands on the controls and adjust the camera only when stopped.
Using physical camera controls with motorcycle gloves
Set up and test each control while parked, so recording does not require mid-ride adjustments. A clear plan for mounting, settings and sound helps you keep your attention on the road.
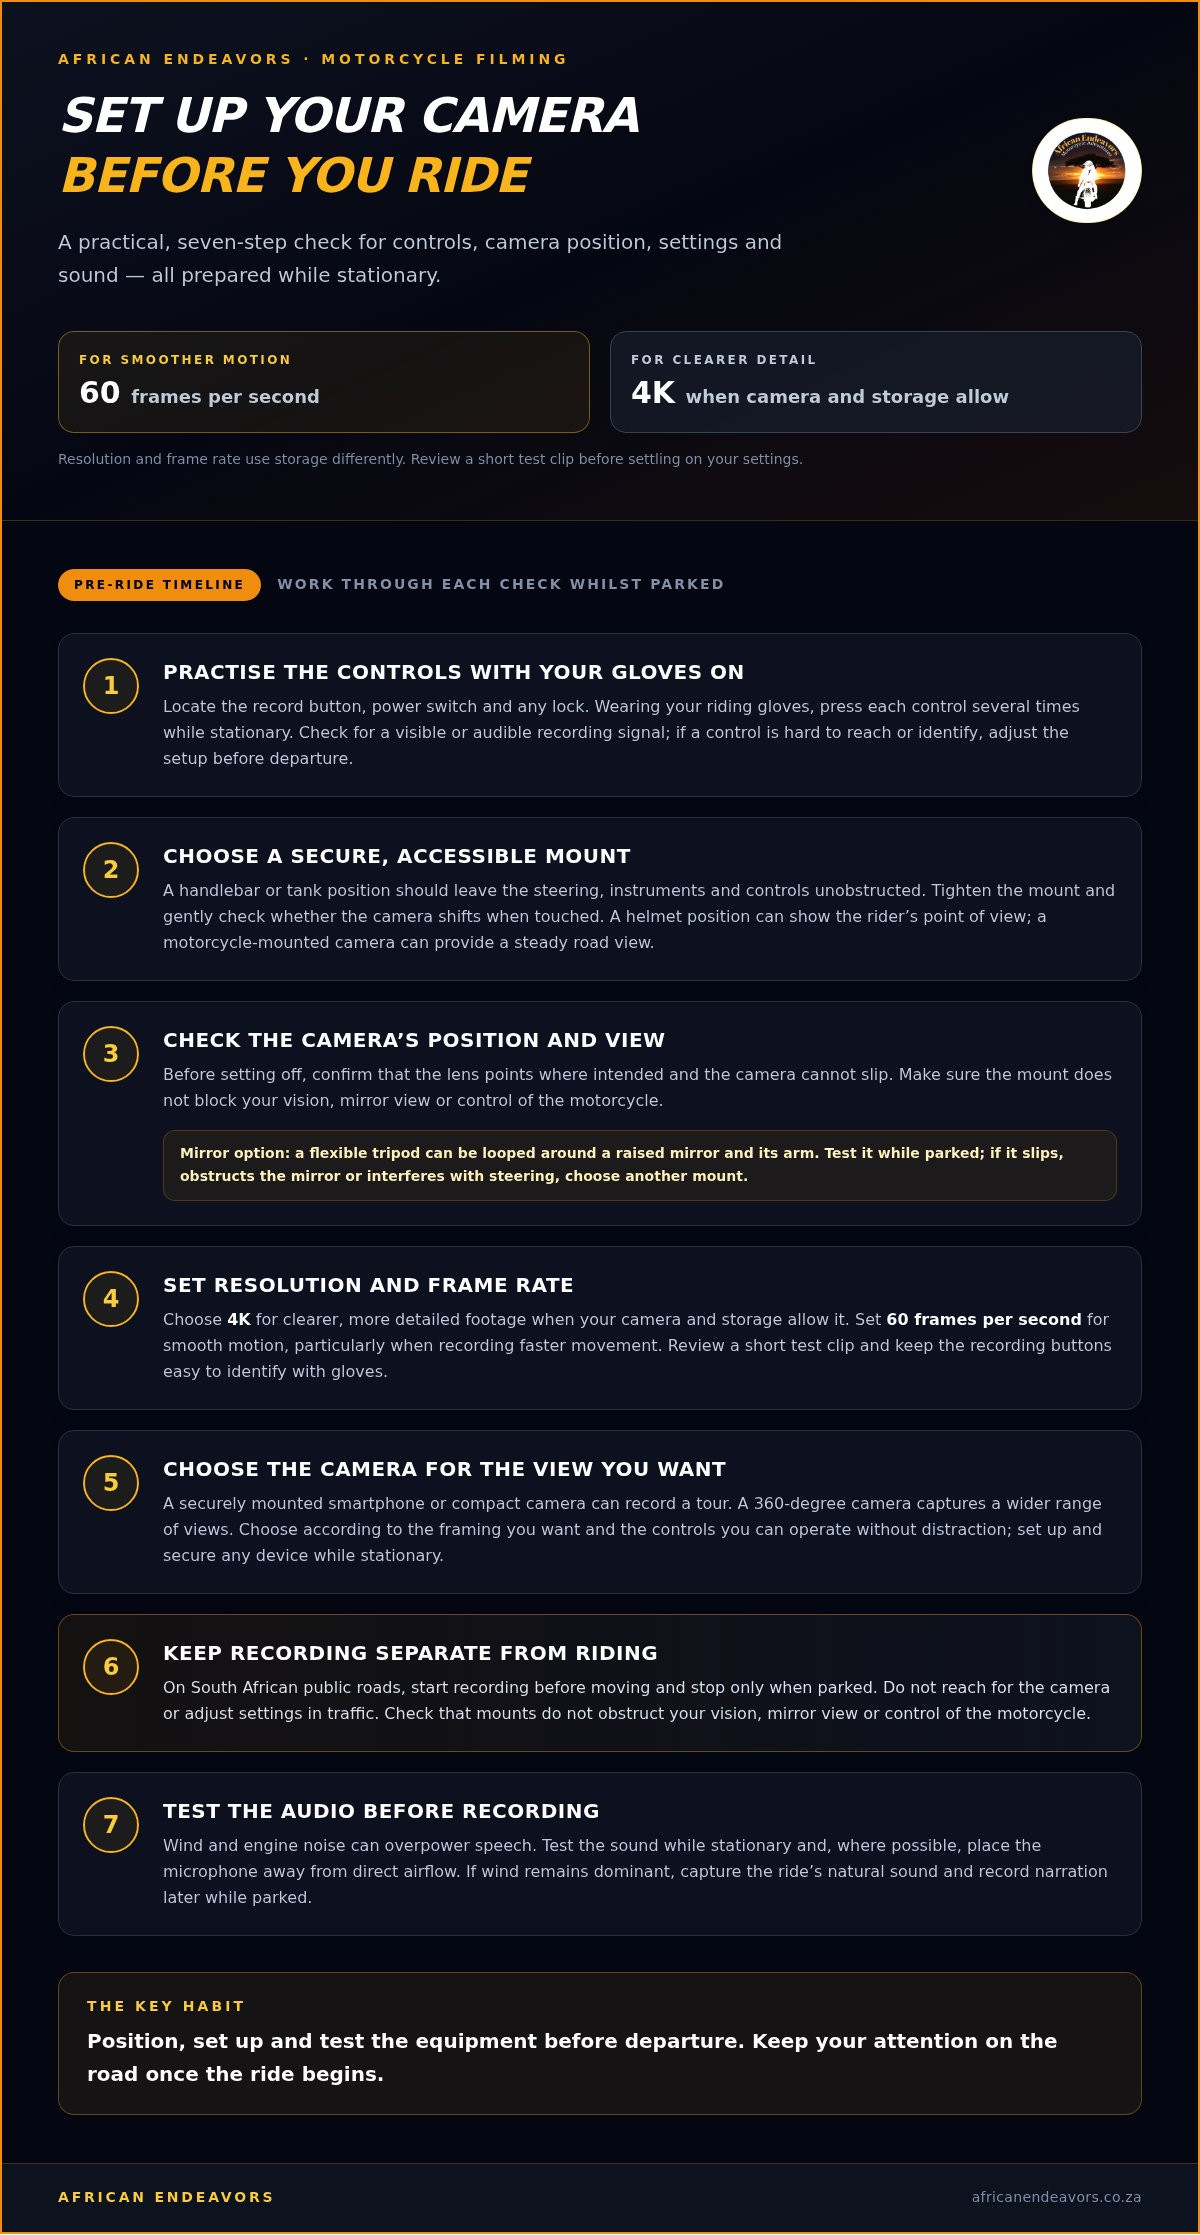
- Practise using the physical controls with your gloves on. Locate the record button, power switch and any lock before setting off. Press each control several times while stationary, wearing the gloves you’ll ride in. Confirm that the camera gives a visible or audible recording signal. If a control is difficult to reach or distinguish, adjust the setup before departure rather than fumbling for it on the move.
- Choose a mount that stays secure and accessible. Select a handlebar or tank position that leaves the steering, instruments and controls unobstructed. Tighten the mount, then gently check whether the camera shifts when touched. A helmet position can show the rider’s point of view, while a motorcycle-mounted camera can provide a steady road view. Ensure neither position blocks your vision or makes the controls harder to use.
- Mount a camera on a rear-view mirror only after checking its position. One option is to wrap a flexible tripod around a raised mirror, looping one tripod leg around the mirror arm. Secure the camera while parked, then check that it cannot slip, obstruct the mirror or interfere with steering. If it moves during a stationary test, choose a different mount.
- Set resolution and frame rate before you ride. Choose 4K for clearer, more detailed footage when your camera and storage allow it. For smooth motion, set the camera to 60 frames per second, particularly when recording faster movement. These settings use storage differently, so review a short test clip before settling on them. Keep the buttons you need for recording easy to identify with gloves.
- Consider alternatives to an action camera. A securely mounted smartphone or compact camera can record a tour, while a 360-degree camera captures a wider range of views. Choose based on the framing you want and the controls you can operate without distraction. Whichever device you use, mount it securely and set it up while stationary.
- Keep recording separate from riding. For safer filming on South African public roads, start recording before moving and stop only when parked. Helmet cameras and other mounts should not obstruct your vision, mirror view or control of the motorcycle. Don’t reach for the camera or adjust settings in traffic. Position and test the equipment before departure.
- Plan for clear audio before recording. Wind and engine noise can overpower speech, so test the sound while stationary and, where possible, place the microphone away from direct airflow. According to the World Health Organization, avoiding background noise supports good audio quality. If wind remains dominant, capture the ride’s natural sound and record narration later while parked.
Recording shorter video segments
Short segments make capturing video on a motorcycle tour more manageable, both during recording and later editing. In South Africa, equipment costs depend on the camera type, mounts, storage and audio accessories; battery and memory-card recording time varies with capacity, resolution, frame rate and power use.
- Record a clip for each distinct moment. Start a new segment when the scenery changes, you approach a notable bend or you stop at a viewpoint. Rather than running the camera throughout the ride, capture moments that tell the story of that stretch. Short files make it easier to find engaging footage later without searching through long stretches of unchanged road.
- Give every clip a clear beginning and end. Start recording just before the motorcycle enters the scene you want, such as a mountain pass opening into a valley. Stop when the view changes or the moment has passed. This creates a natural edit point and avoids footage of camera adjustments, waiting at a junction or standing still.
- Plan clips around safe stops and route changes. Before departure, decide which moments you hope to capture, such as a scenic stretch, a planned break and an arrival. Start or stop recording only when stationary, or use controls already set up without diverting your attention. Don’t reach for the camera in motion to save a clip or change settings.
- Match each clip to the scene. A brief view of a roadside landmark needs less footage than a winding road revealing a distant landscape. Let the scene guide when you stop recording, then review a sample while parked. If a clip includes a long stretch without a change in view, make the next recording more selective. This keeps capturing video on a motorcycle tour focused on moments worth revisiting.
- Prepare for battery and storage limits. Fully charge the camera battery before a long ride, or connect it to a power source if possible. Resolution, frame rate and continuous recording affect power and storage use, so test your chosen settings beforehand. Check the remaining battery and card space during a planned stop, not when the card fills mid-route.
- Organise files while the route is fresh. After riding, group clips by route section or memorable location, such as a coastal stretch or mountain viewpoint. Give files useful names, then select the strongest moments for editing. Keep finished videos organised and consider archiving older projects to free up space on your main device.
Avoiding sun glare and overexposure
- Keep the lens away from the sun. Pointing a camera directly at the sun can reduce image quality, increase exposure and create glare. Before recording, angle the camera towards the road or landscape instead. For example, frame a mountain pass with the sun outside the shot, rather than directly above the ridge. Check the view while stationary and reposition the camera before continuing.
- Review the direction of light before choosing a shot. Notice where the sun falls across the road and scenery, then choose an angle that keeps bright light out of the lens. A forward view may work on one stretch, while a side-facing position may avoid glare elsewhere. Adjust the camera while parked. Don’t turn or reach for it while riding.
- Watch for signs of overexposure in a test clip. Review the sky, pale road surfaces and bright areas of scenery. If the sky looks blank or details disappear in sunlit areas, the image may be overexposed. Adjust the camera’s exposure setting if available, then record another short test from the same position. Compare the clips before choosing a setting for that light.
- Use exposure lock when the camera offers it. A camera may change exposure as the frame shifts between a dark road and bright sky. Point it at the main subject, such as a shaded bend, and lock the exposure if that control is available. Check whether the road remains visible when the view opens onto brighter scenery. Release the lock if changing light makes the image too dark.
- Keep the lens clean before recording. Dust, fingerprints or smudges can scatter strong sunlight and create haze or flare. Inspect the lens before setting off, especially after handling the camera or riding on dusty roads. Clean it with a suitable soft cloth, then record a stationary test towards a bright part of the landscape. Check for cloudy patches before continuing.
- Review footage when the light changes. A camera angle that works in open sunlight may produce glare when the road turns towards the sun. At a safe stop, inspect a clip and adjust the angle or exposure for the next stretch. For example, compare footage from a shaded section with a sunlit viewpoint. Keep the sun outside the frame and avoid changing settings in motion.
Treat the sun as a potential source of image problems, even when it sits near the edge of a planned shot. Aim the camera at the road or scenery rather than the sun, and reconsider the framing as the view changes. This can help limit reduced image quality, overexposure and glare in motorcycle footage.
What camera gear is best for recording a motorcycle tour?
Choose gear around the view you want, the mount available and how much footage you plan to keep. A 360-degree camera, conventional camera or stabilising mount each serves a different purpose.
- Choose a 360-degree camera for flexible framing. Its two fisheye lenses record in every direction, so you don’t need to point it precisely or mount it level. Attach it to the motorcycle’s tank or handlebar to capture both the road and rider. Later, reframe the footage as a 2D video, choosing the view that best tells the story.
- Pick a 180-degree camera for a more directed view. This can suit on-bike photos when you want to frame a particular direction. A 360-degree camera records a wider scene, while a 180-degree model keeps the capture more focused. Decide whether the priority is selecting a deliberate view before riding or having more of the scene available during editing.
- Use a mount that gives the camera the right position. A motorcycle mount with 360-degree rotation lets you change the camera’s angle to suit the road, rider or surrounding landscape. Position a 360-degree camera on the tank or handlebar, then check that the frame includes the view you want. Make adjustments while stationary, not during a ride.
- Add a self-levelling gimbal for cornering footage. A gimbal can keep 360-degree video level as the motorcycle goes around corners, helping the horizon remain steady through a turn. Test it on a stationary setup first, then review a sample showing a bend. Pair it with a secure mount, since stabilisation cannot correct a camera that shifts position.
- Set resolution and stabilisation to suit the footage. A 4K setting can produce clearer, more detailed recordings, while image stabilisation helps reduce shaking. For smooth motion, use 60 frames per second, especially when the ride includes faster movement. Check a test clip before departure, because resolution and frame rate affect the appearance and storage needs of your recordings.
- Try interval photos for a changing route. Set a 360-degree camera to take an interval photo every 5-10 seconds while riding. This creates a sequence of stills across the journey, offering a different record from continuous video. Review the framing before setting off, and choose this mode for scenes where a series of changing views matters more than continuous motion.
Planning a ride through South Africa’s dramatic scenery? Explore guided motorcycle tours in South Africa and choose a route worth recording.
African Endeavors: The Wild Coast & Drakensberg Tour
African Endeavors offers The Wild Coast & Drakensberg Tour for riders who want to experience these South African landscapes on a guided motorcycle journey. It’s a natural next step if you’d rather focus on the ride and scenery than plan every route detail yourself. The Wild Coast and Drakensberg offer striking contrasts, from coastal horizons to mountain roads, making the tour a compelling setting for memorable footage. Prepare your camera before departure, then capture selected moments without letting filming take attention from the ride. For other landscapes, African Endeavors also offers The Kruger Park & Panorama Route Tour and The Garden Route & Route 62 Tour, alongside Off-Road Dirt Bike Safaris.
To explore the tour, visit africanendeavors.co.za.
Make the next ride a story worth keeping
Let the route shape the story, not the camera. Before setting out, decide what you want the finished footage to evoke: the sweep of a mountain road, changing coastal light or the rhythm of a journey through open landscapes. That intention can guide your camera choices and help you stay present for the ride. Thoughtful capturing video on a motorcycle tour is less about recording every kilometre and more about preserving moments that matter to you.
African Endeavors offers The Wild Coast & Drakensberg Tour, The Kruger Park & Panorama Route Tour, and The Garden Route & Route 62 Tour. Each gives riders a distinct South African setting to experience and remember. If one of these journeys feels like the right next chapter, contact African Endeavors to plan your tour. Choose a road that calls to you, prepare your camera with care, and set out ready to enjoy the view.
Frequently Asked Questions
Where should you mount an action camera on a motorcycle for stable footage?
Use a rigidly secured tank or handlebar mount, positioned so the camera stays clear of the controls and your view. Before riding, check the composition with the motorcycle upright, then see whether the mount shifts when the engine is running. A helmet position can offer a rider’s-eye view, but it should not interfere with helmet fit or movement. Recheck the attachment at planned stops.
What camera settings work best for motorcycle touring footage?
Choose settings to suit the light, movement and final viewing format. Turn on image stabilisation if your camera offers it, and use automatic exposure when sunlight and shade change rapidly. For a backlit scene, review a test clip to see whether the rider or road becomes too dark. A wide field of view includes more surroundings, while a narrower view can emphasise a particular subject.
How do you plan and record a motorcycle tour video?
Plan a simple sequence before departure: a stationary introduction, selected road views, a stop that shows the landscape and an arrival shot. This gives the finished video a sense of journey rather than a collection of unrelated scenes. Note the moments you want to capture, then start and stop recording only when safe. At a break, check that the footage and audio are usable before continuing.
How can you protect cameras from rain, dust, vibration, and theft on a tour?
Use a camera housing or cover rated by its manufacturer for the conditions you expect, and keep a clean lens cloth in a sealed bag. Dust can collect around buttons and mounts, so inspect and clean those areas during stops. Check that fasteners remain secure after rough sections. When leaving the motorcycle unattended, remove the camera and store it out of sight. A mount alone won’t prevent theft.
How long do camera batteries and memory cards last while recording?
Recording time varies with battery and memory-card capacity, resolution, frame rate and power use. Check the remaining battery and card space during a planned stop.
